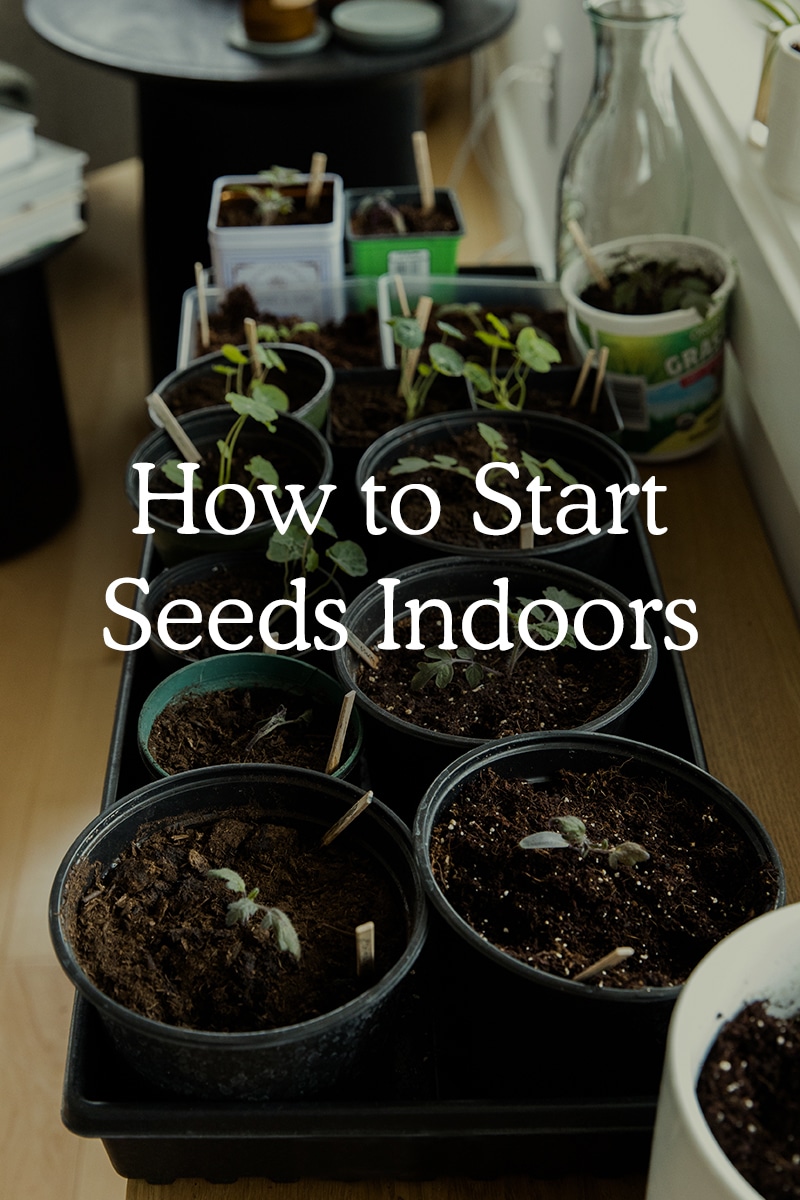
Over the years I have done a lot of trials on how to start seed indoors so I have written a quick guide to help you from lessons I have learned along the way. This isn’t foolproof. Seed Starting is very hard, but as I explain in our podcast this is about turning our attention towards the rhythms of plants and nature herself. You can listen to this idea on the Fresh Exchange podcast, but if you are simply looking for the how-to tips to start seeds at home, which quick guide below with a list of essential items will be very helpful as well.
How to Start Seeds Indoors – A Quick Guide
1. Know the right time to begin your seeds indoors
EVERYTHING about successful seed starting begins with understanding your Hardiness zone, and then reading info on the back of a seed packet about the amount of time to start before “Last Frost” or for Fall plantings the “First frost”. Most seed packets will also give windows of germination as well. If you need help strategizing this I have this post with a Seed Starting Organizer sheet on this post you can download for free as well as a Youtube video as well that will be helpful in explaining this further.
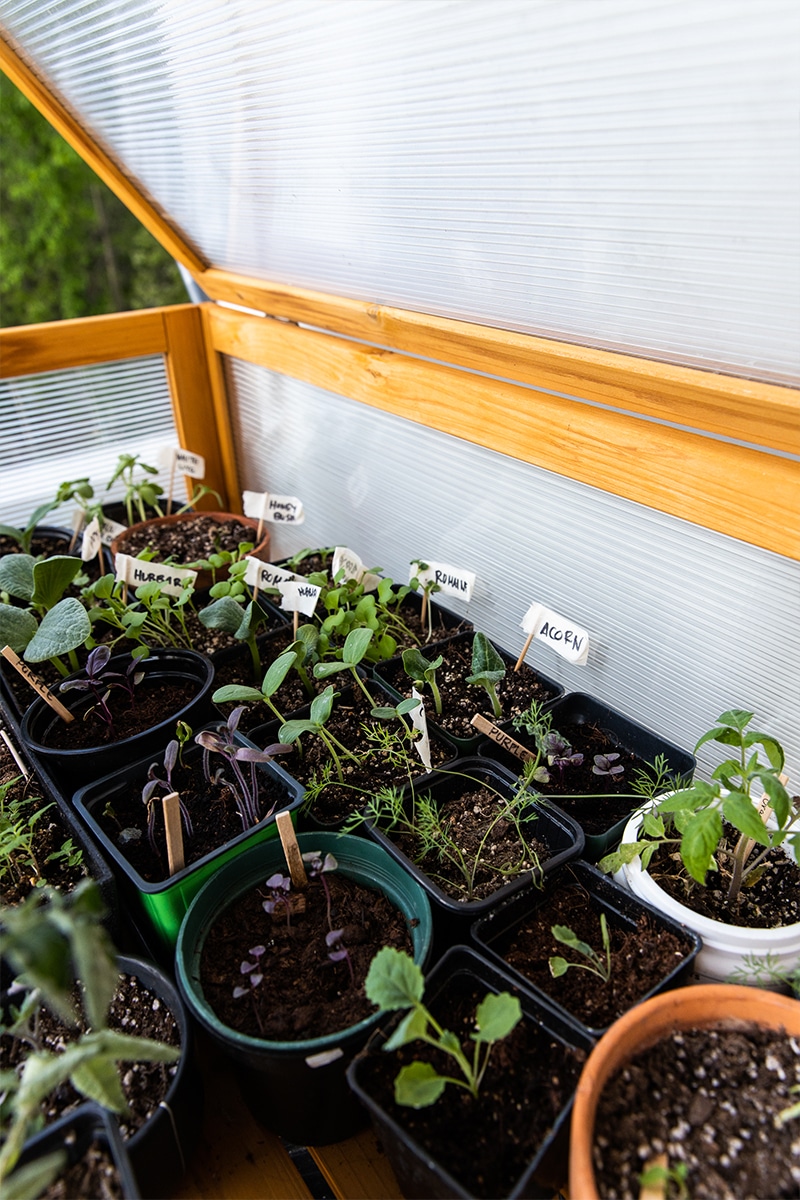
2. Have the right containers
There are many theories on what to use for your seed starting. I mean lots. I have learned over time after trying basically everything that it is about your humidity in your home, the length the plant will be in the container, and what your setup and budget are. A few favorites are using seed trays and soil block makers if you are looking to do a LARGE number of seed starts. The other thing you can use is plastic containers from packaging like salad mix or apple containers or even large plastic egg trays. If you use these shift your watering routine or add holes in the bottom and keep a close eye on water standing in them. You can also use some of these containers like greenhouses. If you do this also be prepared to move seedlings later so if you are doing something that doesn’t like their roots disturbed (usually noted on the seed packet) then I would not suggest placing them in these settings. In that case, give them something with more depth so the only time you disturb them is in the spring or early summer when you plant them in the ground. You can get creative just to insure, drainage, depth, and remain aware of your plants.
3. Have great light
What you are looking for is an LED light that is either full spectrum or has a red/blue spectrum. This is most ideal for growing. Wattage though important isn’t a make or break in my experience. Know that running lights will raise your electricity bills so take that into account with seed starting cost for your year. You also want to make sure you raise and lower the light as plants grow as you can burn them up if you are not keeping a sharp eye on it.
4. Choose the right soil to start your seeds indoors
I suggest an organic seed starting mix. I suggest a company that isn’t Burpee or Miracle-Gro either. These brands as a whole are not as sustainable in their practices as say Frog Farms would be. Smaller local brands can be awesome options as well. Another sustainable option can be organic coco coir. Just make sure you are feeding the seedlings properly.
5. Pre-soak soil with some warmish water before starting seeds
Before setting seeds I like to pre-soak my soil a little to make it damp and then place seeds in the soil after. This ensures that the seeds don’t move and float away when you go to water. In fact, you won’t have to water for a day or so right away with this method. Just do not OVER soak your soil. Because the soil is typically dry this initial soaking should just enough to get some dampness into the soil to make it easier for it to absorb future waterings and not make your seeds float up to the top.
6. Do not pack your soil tightly
Keep your soil loose so the seeds can easily build strong root systems.
7. Read the packets for proper seeding info
Your seed packets and seed company websites should offer you the best info on how to start your seeds so follow close directions to know how deep to set the seeds and how far apart.
8. Get the heat going
Sometimes all you need is to set them in a warm sunny spot in your home or run a space heater in the room they are being started. You do not need a heat lamp or anything but the goal is to keep the soil for most seeds between 60-80 F degrees depending on the seed. Most days you may not need anything but just use a thermometer to check the temp if you are unsure.
9. Move pots if necessary
Some plants such as tomatoes need to move up into larger pots as they increase in size. They dive DEEP roots into the ground so it is really important they keep about 2 times the depth of their height in the soil underneath them. You can see a video here on how to do this and when!
10. Feed your seeds well
Most Seed starting mix isn’t really nutrient-rich so you can use a really gentle solution every 4-6 weeks to feed your seeds using an organic Seaweed Concentrate or organic Compost Tea from a worm composter. This will provide essential nutrients to help your seeds thrive. You could also use some compost on top around the base of the plant so every feed it soaks into the soil a little. Any of this will work. Just be very careful not to overfeed as you could burn the plants.
11. Keep them damp and don’t let them dry out
Monitor the water levels. Overwatering or under watering is VERY easy at this stage. So keep track of them very closely.
12. Remove the light and raise it as necessary
As the plants gain in size you need to adjust the lighting in almost every case. Just keep an eye. If the seeds are drying out quickly raise the light higher or even remove it and move them to sunny spots.
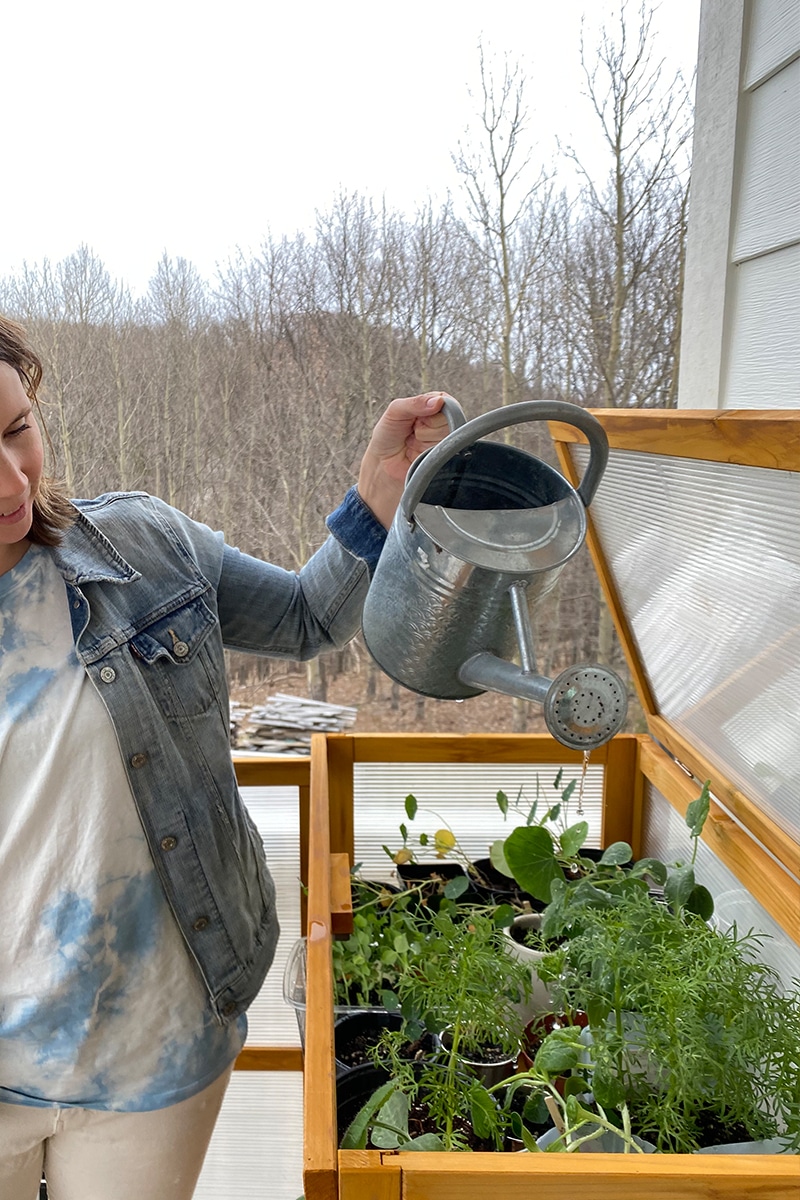
13. Harden off seedlings to prepare for outdoor life
Before planting in the ground you want to slowly harden off the plants by exposing them to the outdoors for a few days or a week. Keep a close eye on the weather. I use a small greenhouse like this to help tender plants like Tomatoes get used to the temps. I open the lid during the day to release heat and close it at night to protect them from temps in the 40s and 50s. If a hard frost is coming I bring them back indoors to protect them. This is so important for plants because with hardening off we help the plant adapt to their new home gently. A harsh move can kill or stunt their production potential and all your hard work is gone out the window.
Common Issues in Starting Seeds Indoors
- Yellowing Leaves: depending on the plant I find this is either under or overwatering or potentially not having enough room in their seeding location.
- Rootbound: This is most common in Tomatoes. You will see this happening with yellowing leaves or leaves falling off of the plants on the bottom. This is a sign to gently move them to a deeper pot. I sometimes have to do this 2-3 times in a seed starting session.
- Mold: This is evident on the dirt. You will see fuzzy white mold. It happens, but this means potentially your plants are going to lose a battle here. This is why monitoring the dampness of soil and also removing coverings if using greenhouse systems is important. Heat and moisture make mold so make sure your watering is dampening not soaking and the plant has time to soak in the water or it can drain. The most humid your home and area the more common this is.
- Drying up/wilting: I find this happens a lot if a heat lamp hasn’t been raised. Those heat lamps will soak up all the moisture and your whole seeding will die in just a few hours. The seedlings are VERY tender so you have to keep monitoring constantly like sometimes multiple times a day. I like to keep my seeds in a place I can easily watch them for this reason.
My Essentials for Seed Starting Indoors
These are my favorite items to have on hand if you are planning to get into seed starting. These aren’t all 100% needed for all seed starting situations but they are very helpful items to have.
- Heat Mat
- Containers – I suggest using containers from your single-use items in your home. If they are plastic make sure they can drain. I use trays for my seedlings so they don’t drip on my floor.
- LED Grow Light – Lots of options but what you want is one you can adjust up and down for most small beginner growers something like this is enough but if you have a larger setup you want something with blue/red (aka purple) color grade that you can adjust as your plants grow. Hydroponic stores are awesome resources if you have them locally.
- Soil Blocker or Peat Pots
- Soil thermometer
- Great window light
- Larger pots – These pots need to have a depth of 6-8 inches or so for tomatoes, peppers, flowers, and other things that may have to wait till the exact right moment to get outside. The depth is necessary so their roots have plenty of space. Collected plastic pots from nurseries or even milk jugs or large yogurt containers are awesome as well.
- Seed Starting mix – I like Fox Farms the best which most local stores carry. Black Gold is another one I have liked as well.
- Compost tea/Seaweed fertilizer: Always go with an organic fertilizer when you use them and if you choose to use them. Compost tea and Seaweed Fertilizers are the absolute cleanest options for fertilizing and in most cases all you need. Follow the directions for dilutions or steeping depending on the kind you get. I like to feed my seedlings after they moved up in their pots once and then once again just before going into the ground. It helps them get a little jump start.
- A Gentle watering can – This plastic Haws Watering can style is perfect for starting your seedlings with the most gentle of all rain showers so seeds aren’t washed out of place
- Plant Markers and Permanent Marker: I use popsicle sticks because they are cost-effective and a black sharpie so the ink doesn’t run when I water them.
- A larger watering can – Once your plants are larger and you have more of them, having a good watering can that can cover the ground well and gently is important. These are awesome cans to have around.
- Small hardening off area: I love this little porch-size greenhouse for our porch to protect plants as they prepare to harden off in May. It works incredibly well. You can see it above.
Starting your seeds is a beautiful way to reconnect yourself to the soil and ground after a long winter with the ground covered with snow. I deeply look forward to the beginning of this time of year in our home and I talk more extensively about it here on the podcast if you would like to expand this experience beyond just a How to do something and into the reason why I love seed starting.
If your article made you start seeds indoors, consider checking out these articles below –